Thursday, June 13, 2013

Happy Fathers Day

I'm playing along again this week with the monthly Dreamweaver Stencils Challenge.  You may have noticed that our team is now split into an A and B group but sometimes we hop on board an extra week!  We also have the lovely Jenn Dove as a guest this month.

Our theme this month is "Pinterest Inspired" so this is an easy one for you to hop in and join us!  Just use any pin from a Pinterest board as your starting point.  I used a card from the fabby Pam as my inspiration.


I used the Paisley stencil for my blue background which was dry embossed on Core'dinations cardstock and then sanded with my sand It gadget.

The Necktie stencil I dry embossed twice: once on white (you can barely see the raised shirt collar in the pic sorry!) and once on dark green.  I then added the Paisley stencil over the tie stencil on the green and applied blue and green distress ink through the stencil with sponge daubers.

The fathers day sentiment is  a stamp from Guys and Gears by Stampendous.  And below is the photo of Pam's card from the Dreamweaver Stencils Pinterest board:


Here's the list of this week's players so be sure to hop over and see what they have created for you:


Monday, June 10, 2013

Twinkling H2Os meet Silks

Good morning!  I am up today with the Monday tutorial on Paper Craft Planet.  Today I wanted  to share some fun techniques with Twinkling H2Os and Silks from Splash of Color!  Twinkling H2Os have been around forever and we all used to watercolor with these gorgeous shimmery paints.  But there has recently been a new resurgence of love for this product since Splash of Color (formerly Creative Imaginations) took over the product line from Luminarte.  Now its all about the possibilites of using these babies in Mixed Media!

Please head HERE to see the tutorial on how I created this background in my Art Journal.


I left this background as a base in my Art Journal and I will add to it later.  When Art Journaling sometimes I just love to create backgrounds, sometimes I am experimenting with new products or techniques, other times I add some doodling or journaling when I find a fabulous quote.  My journal is always an ongoing project!

Products Used:

Friday, June 7, 2013

Blog Hop with Stampendous, Core'dinations, and May Arts

It's the big blog hop today!! Stampendous, Core'dintions, and May Arts have been working together all week to bring you some really fun projects and I hope you've enjoyed them!  Details on the prizes and HOW to win are below so be sure to click on this post for all the details!


I created a layout for you today starting with a Core'dinations cardstock base.  I added a couple of pieces of Black Magic core'dinations that were embossed with Dreamweaver Stencils (Houndstouth and Mosaic Swirls) and pics layered on more Core cardstock.


My tags are from the David Tutera line for Core'dinations and are stamped with Life is Art and Dream Text.  I also added some Aged Black EP and Color Fragments in Teal, Hot Lime, and Hot Blue.


Under the Life is Art tag I added lots of strips of fun May Arts ribbons!


Be sure to comment on each blog to increase your chances of winning! Also be sure to visit our Facebook Page and share one of this week's Blog Collaboration posts on your Timeline for an EXTRA chance to win your choice of a spool of May Arts Ribbon or a tag set from Core'dinations! Let's Review: The Blog Hop Prize package from Stampendous consists of: 

CRS5044 Cling Jumbo Butterfly Trio

CRS5044 Cling Jumbo Butterfly Trio

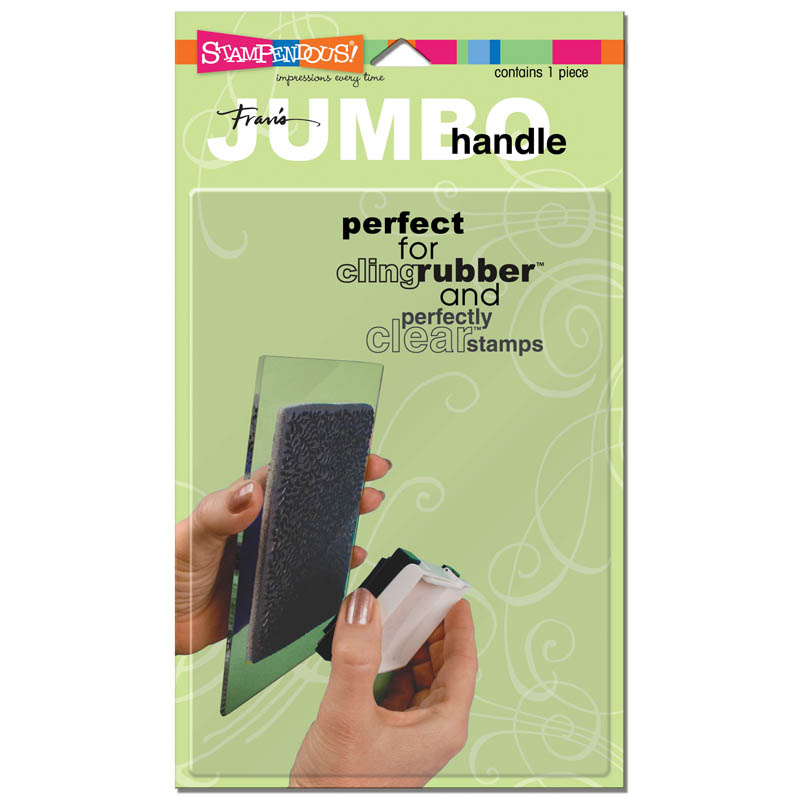
SSH57 Cling Jumbo Handle

SSH57 Cling Jumbo Handle


A random selection of David Tutera Celebrate Products Available at JoAnn Fabric and Crafts

A random selection of David Tutera Celebrate Products Available at JoAnn Fabric and Crafts
A Sand It Set from Core'dinations

A Sand It Set from Core'dinations

A random asst. of May Arts Ribbon from our stash - This is Ribbonista Virgina Fynes photo of her storage method!

A random asst. of May Arts Ribbon from our stash - This is Ribbonista Virgina Fynes photo of her storage method!

THEN - the May Arts Blog is offering us an opportunity to give a way ANY two rolls of May Arts Ribbon! So if you SHARE our Collaboration Posts from our Facebook Page on your Facebook timeline, you will be entered to choose one of those! ALSO - the Core'dinations Blog is offering us two sets of tags for this as well! So FOUR people who SHARE our Facebook Posts will each win one of these. You have to SHARE, not just comment, not just "like", you must SHARE. (and we can tell if you did!). So here we go!

Asia King

Cyndi Bundy

Jamie Martin

Jennifer Dove

Krissy Fossmeyer

Kristine Reynolds

Lea Kimmel

Rhea Weigand

Tenia Nelson

Tobi Crawford

Karen Baker

Sandy Allnock

Virginia Fynes

Debbie Standard

Kim Moreno

Mary Pat Siehl

Thursday, June 6, 2013

Dreamweaver Stencils Pinterest Challenge

We have a super fun new challenge for you this month at Dreamweaver Stencils!  Go search though pinterest and then create something that was inspired by a pin!  How easy is that?

Here is my card for this week using the new Cherries stencil.  I first used Glossy White paste through the stencil and then once that was dry I added Distress ink on top of the paste, then clear EP and heated it for a super glossy bright look!


Here is the pin that inspired this card...the colors and the food theme!


Now be sure to hop around to everyone's blogs and leave them some love!  PLus we have a super star guest joining us this month...Jenn Dove!

Tuesday, June 4, 2013

Stampendous, Core'dinations and May Arts Partner up!

Good morning!  This week the Stampendous gals are teaming up with Core'dinations and May Arts for all kinds of fun projects!  AND there will be prizes! Stampendous is giving away three prize packages including the Cling Jumbo Butterfly Trio (WITH Free Template included), A Jumbo Perfectly Clear Handle, a random assortment of the David Tutera products,  some Core’dinations goodies (again random), a Sand-It tool to make the most of your ColorCore paper, and some yummalicious May Arts Ribbons (random assortment). So be sure to comment on everyone's posts all week long!


My card today started with the Thank You piece which is part of the David Tutera Step 2 Greetings Combo White from Core'dinations.  I sprayed it with Blue Skies Glimmer Mist and then stamped Shell Background in Frayed Burlap ink.  I layered that onto a piece of Neutrals Core'dinations and then my card base is from the Graphic 45 collection also from Core'dinations.


In the top corner I added some Shells from the David Tutera Step 3 Seashell Shapes pack and a small tag stamped with a bit of the Shell Background and tied with some fun May Arts Bakers Twine.


I also sanded all of my edges and the embossed parts of the David Tutera elements with my Sand It Gadget.  Above is a photo of how gorgeous this cardstock is when distressed by sanding!

Folks from all three teams have projects for you today! Leave a comment on each blog for the best chance at winning. PLUS... visit our facebook page and SHARE on your Timeline one of this week's posts about this Blog Hop. We'll choose 4 random winners this week from the "sharers" - 2 will get to choose ANY roll of May Arts ribbon and two will get tag packs from Core'dinations. (this is beyond the regular prizes already mentioned!). But you HAVE to SHARE a post on your timeline. So visit our facebook PAGE - click the word Share underneath one of our posts, and choose "Share on your Timeline" to enter. Here's who is hopping today:

Asia King

Cyndi Bundy

Krissy Fossmeyer

Lea Kimmel

Gini Williams Cagle

Jen Shears

Jenifer Cowles

Clare Buswell

Ellen Sosnoski

Ava Gavloski

Monday, June 3, 2013

A Mixed Media Canvas using Spectrum Noir refill ink

Good morning!  Its that time of year where all moms are super busy with end of the year stuff so I apologize for not blogging more lately!

My tutorial for Spectrum Noir this month touched on ways to use your reinkers in a Mixed Media project.  You can see the full tutorial HERE.


My canvas started as an experiment inspired by a Donna Downey online class.  It started as letter stickers randomly applied and then paint.  At that point I was stuck with what to do next on top of this super bright color palette that I had created so I pulled out my reinkers and gesso...


The process that I used with my Speccie reinkers can be seen at the link above, but I wanted to share the rest of what went into this canvas as well.  After I added new layers I added a touch of plain gesso to tone down the brightness, then added soem aqua Gelatos from Faber-Castell through my Hexagons stencil from The Crafters Workshop.  The gelatos are always a fun way to bring in more texture and layers!


The last layer of the canvas (as seen in the first photo) was to add the new Corn Flowers stencil from TCW using paint and a black sharpie paint pen to make it really pop!  I finished it off by adding a sentiment stamp from Stampendous called Flower Path.

Friday, May 31, 2013

Stampendous and Envirotex Resin Blog Hop

We hope you've enjoyed the inspiration this week as our team has been playing with the Resin Crafts Blog featuring EnviroTex Jewelry Resin from ETI and their brand new Jewelry Clay! We've had fun bringing you these terrific projects. Be sure to comment on all the blogs for the best chance to win these terrific products. Our prize package includes BOTH the clay and resin, plus a nice assortment of bezels from Nunn Designs, and, of course, some stamps and Essentials from Stampendous! One of the things we love best are the terrific videos that show you just what to expect from these products. Here's the EnviroTex Resin Video: [youtube http://www.youtube.com/watch?v=whnsO3dsHOk] And this one shows you all the details on Jewelry Clay: [youtube http://www.youtube.com/watch?v=c22EQ-ARn8E] There are also downloadable .pdf's on the Environmental Technologies site, and the directions that come in each package are extremely complete and very helpful. We're creating crazy around here with this too fun resin and clay!

For my project today I am pulling one out of the archives from last year.  Why?  1> because I really liked it! and 2> i won't whine but with end of the school year and lots more going on, well, you know, we procrastinators go belly up sometimes.


I used Halloween Sprite, Black Glass Glitter, and Trick or Treat Color Fragments in my Resin for this one along with a piece of Ranger Memory glass.  Halloween Sprite is now retired but can be found in many stores by searching HERE and I know that my local store Betty's has some still.

She was colored with my Spectrum Noir markers (PL3, PL2, PL1, Lv3, LV2, Lv1, OR3, OR2, TN5, IG7, IG5, IG3, IG1, FS9, FS4, DG3, CG3)


You have until Sunday night to comment on the blogs below to be in the running for our prize packages! Here's who made some new inspiration for you today:

Resin Crafts Blog

Asia King

Cyndi Bundy

Janelle Stollfus

Krissy Fossmeyer

Kristine Reynolds

Lea Kimmel

Rhea Weigand

Suzanne Czosek

Tenia Nelson

Tobi Crawford

For more chances to win fun stuff, join us next week for another Blog Hop! (I don't know how we got three in a row either, but hey...more prizes!!) This time we're playing with Core'dinations, and May Arts Ribbon. You know paper and ribbon get us going every time, so don't miss a minute! (you really should just subscribe if you don't already... it's at the very top of the post) PLUS - remember this is the final week of May's Fabulous Floral's Challenge! Be sure to add your project to the linky tool in the right sidebar or on the May Challenge Page.

Thursday, May 30, 2013

Dreamweaver Thursday: Tiny Treats Challenge and PCP Tutorial

I'm up today for this weeks Dreamweaver Tutorial on Paper Craft Planet.  Be sure to check out the full tutorial HERE and leave a comment on that post for a chance to win!


Its also the last Thursday for this months Tiny Treats Challenge at Dreamweaver Stencils.  I'm not up this week, but I threw together this bracelet yesterday.  Not the best pic, LOL, these bangles are hard to photograph!  I painted my bangle with Distress paints and then sponged more distress paint through the Mosaic Swirls stencil on the flat portions.


Here's the list of who's playing this week so be sure to check out their treats!


Wednesday, May 29, 2013

Fun with Resin

This week the Stampendous gals are thrilled to get to play with Jewelry Resin and Epoxy Clay from EnviroTex!  Carmi from EnviroTex was kind enough to share lots of goodies with us last year and again this year :)

In fact I still had some leftover resin from last year, its in two separate bottles that you mix together so I was hoping it would stil activate and it sure did!  So now I have another whole batch for later this week!


For today's project I pulled out a jumbo bottle cap from my stash (I think its Maya Road).  I inked some cardstock with Tim Holtz Distress stains, then stamped Sewing Elements with Versafine ink and embossed it with Clear Detail EP.

Next I mixed my Resin and poured it in then added bits of Teal Color Fragments, Mint Color Fragments, Powder Blue Color Fragments and plus some Black Crushed Glass Glitter and tada!

Sunday, May 26, 2013

Paper Craft Planet Scrappy Sunday Sketch

Its my turn at the Paper Craft Planet Blog today for Scrappy Sunday and I would love for you to please  go join in our challenge HERE!

I have been playing more and more with Project Life, even if I don't do it every week it gets me scrapbooking again!  There are so many options out there now for the divided layouts.  I used to do these all the time (without the pockets) and we called it color blocking.  Its a great way to get lots of photos on a page.


For my page today I used:
Becky Higgins Project Life divided protector
Poppy Favorite Fabric pieces (LYB)
Poppy 6x6 Paper pad (Little Yellow Bicycle)
Poppy Canvas stickers (LYB)
Poppy Chipboard stickers (LYB)
Poppy Vellum Tape (LYB)
Spiced Marmalade, Festive Berries, Peacock Feathers, & Mowed Lawn Distress ink pads (Tim Holtz)

Here's the sketch that I created for you if you would like to play along.  (Tip: If you don't have the divided protectors just make each panel slightly smaller than 4x6 and then mount them all on a plain 12x12 sheet of cardstock!)